Using the Materials Editor#
The Materials Editor can be opened by clicking the  button on the INSUL toolbar. It can also be opened from the settings menu by selecting: Calculation > Materials tab.
The Materials Editor provides the ability to directly create, edit and delete INSUL's and the users custom lists for:
There are Tabs in the editor for each of these lists. Select the tab you wish to view a given list. For example, select the Material tab. INSUL's insulation materials are shown on the list at the left-hand side of the window. To select a new material, scroll through the items on this list.

The details for each item on the list are provided on the right-hand side including an items Name and Type and properties such as Density, Thickness and Colour. As each new item is selected, the details update.
Info
Editing occurs in real-time, editing any of this detailed information will edit the underlying INSUL files.
Advanced information for an item is hidden in the initial editor view. To view advanced properties, such as Young's Modulus and damping, click the Show Advanced button.
To change the colour of an item, click on the coloured panel and select a new colour from the colour dialog. To select a brush pattern for the item, click the Texture button.
Regions#
Each item also includes a Regions property, which describes the various Region lists within which the item can appear. To view the Region properties for an item, click the Show Regions button and view the Region window that appears. Selected regions will appear in black text, unselected regions will appear in grey. To change the regions selected for that item, double click the Region window.
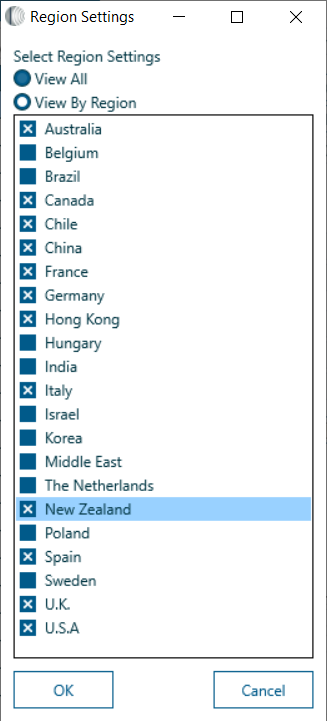
To select the regions that are displayed by INSUL, click the Globe button from the toolbar at the top of the form. From the resulting dialog, the Region or Regions to be viewed can be selected from a list of checkboxes. A View All option is also available. When this dialog is closed, the Materials Editor will update to display all items from all selected lists.
Rearranging items#
The up and down arrows at the base of the list on the left-hand side will adjust the position of the selected item in the list. The order of the materials in the Materials Editor is the same as in INSUL.
Creating new items#
To create a new item, click the plus button  from the toolbar on the left side of the screen. If you wish to create a new item by duplicating an existing item, select the existing item, and click the small button, ___, near the Name edit box.
Deleting materials#
To delete an item, select the cross button  from the toolbar on the right of the window.
Undo and redo#
To Undo or Redo any action, use the Undo and Redo buttons at the top left-hand side of the form.
INSUL lists and user lists#
To create new materials or customized materials it is recommended to use the inbuilt User List. To select the User List, click the User List button at the top left-hand corner of each of Tab page. This will toggle the view from the INSUL list to the User list. The INSUL list displays items in black text. The User List displays items in blue text. It is possible to export and import materials via an XML file.
Customised materials can be created, edited and deleted in the same manner as INSUL items, as outlined above. When the Material Editor is closed, Customised items appear at the top of the list within INSUL, in blue text.
Closing the materials editor#
The Materials Editor may be closed either by clicking the OK or Cancel buttons or the exit button at the top right-hand corner of the form. Selecting the OK button will save all changes to the Materials Files, and refresh INSUL so that the changes appear immediately for modelling. Selecting Cancel or Exit will close the form without saving any changes. The existing INSUL materials files will not be updated.
Importing New Materials#
It is possible to export and import new materials.
The pictures below tell the story better than words. In this case, the INSUL developers have set up a new material called "Straw and Clay Wall" and exported the material to an XML file named 'Export User Material.xml'

Step one

Step two

Step three
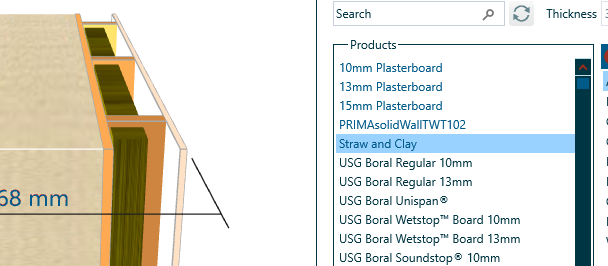
Step four
Countries & Regions#
INSUL has built up databases for materials from many countries.
Info
From INSUL version 7.0, these databases are combined into one file each for materials, absorbers, floor coverings, glazing materials and sheet metal profiles.
The following countries and regions are currently included in INSUL:
- Australia
- Belgium
- Chile
- China
- France
- Germany
- Hong Kong
- India
- Italy
- Korea
- Middle East
- The Netherlands
- New Zealand
- Poland
- Spain
- Sweden
- U.K.
- U.S.A
The user can select to filter the database so that only the materials from one country are shown, or from many countries. The countries selected are shown in the status bar at the bottom of the main screen. The filter can be adjusted in the materials editor.
Folder Permissions#
If the user encounters an "access denied" error after entering a new material, then the problem is usually due to the user not having sufficient rights to some folders on the user's computer.

The user should change permissions in 3 folders:
C:\Users\username\AppData\Roaming\Marshall Day Acoustics\Insul90\materials
and
C:\ProgramData\Marshall Day Acoustics\Insul90\materials
and
C:\Program Files (x86)\Marshall Day Acoustics\Insul90
Use Windows Explorer to browse to each folder in turn, then right-click on the folder name and go to "Properties" and then the "Security" tab.

The user must have read/write access to both of these folders (see picture above). You will need Administrator rights to alter the permissions.